


Let’s be honest. You’re here because you’ve felt that sinking feeling.
The creative lightning strikes. A riff that feels heavier than a black hole rips through your fingers. You scramble to your home studio, your personal sanctuary, and for hours, you pour every ounce of your passion into capturing this beast of an idea. You track the guitars, program the drums, lay down the bass. You are a creator of worlds, a wielder of thunder.
Then, you lean back in your chair, take a deep breath, and hit the spacebar to listen back.
Silence. Then… disappointment.
The sound that emerges from your speakers is a weak, distant echo of the sonic titan you heard in your mind. The guitars are thin, fizzy, and lack weight. The drums sound like plastic toys, not instruments of war. The entire song is a muddy, confusing mess. It sounds like a demo. It’s your demo, and you love it, but you know deep down it doesn’t have the power, clarity, and polish of the professional records you idolize.
This gap between the vision in your head and the reality coming from your speakers is the great wall that every aspiring musician and producer must climb. It can be incredibly frustrating. It can make you feel like you’re missing some secret knowledge, some magic piece of gear that everyone else has.
Here is the truth: There is no magic. There is only knowledge.
And this guide is going to give you all of it.
This is not a short blog post with a few quick tips. This is a comprehensive masterclass designed specifically for the absolute beginner. We will hold your hand through every single step of the process. We will define every term, explain every technique, and demystify every piece of software. By the time you finish reading this, you will have the complete blueprint to take a simple idea and forge it into a devastatingly powerful, professional-sounding metal track.
We will cover the mindset of a producer, how to set up your room for free, what gear you actually need (and what you don’t), how to record pristine audio, how to sculpt god-tier guitar tones, how to program apocalyptic drums, how to mix all the elements into a cohesive whole, and how to master your track for the world to hear.
This knowledge was once the exclusive domain of professional engineers like Jaroslav Holub, the founder of Develop Device, who spent over two decades in the trenches of his professional studio to master these skills. Today, that expertise is not only being shared in this guide but has been distilled into powerful tools that can serve as your ultimate shortcut.
This is your new bible. Let’s begin your journey from demo to devastation.
Part 1: The Foundation - Preparing for Battle
Before we even think about making noise, we must first build our command center and sharpen our most important weapon: our mind. This foundational stage is the most critical, and skipping it is the #1 reason most home productions fail before they even start.
Chapter 1: The Producer's Mindset - Your Brain is the Best Gear You Own
Your success as a producer has less to do with the plugins you own and more to do with the way you think. Let's install the correct mental software.
Understanding Your Role: You Are More Than a Musician
When you decide to produce your own music, you put on several different hats:
-
The Songwriter: The creative spark. You write the riffs, melodies, and lyrics.
-
The Performer: The instrumentalist. You execute the musical ideas with skill and emotion.
-
The Engineer: The technician. You are responsible for capturing the performance cleanly and correctly.
-
The Producer: The project manager and visionary. You guide the song from an idea to a finished product, making key creative decisions along the way.
-
The Mixer: The artist/scientist who balances all the recorded sounds.
-
The Mastering Engineer: The final quality control specialist.
You must learn to switch between these hats. When you are performing, focus only on giving the best, most emotional performance. When you are engineering, focus only on the technical aspects of capturing that performance perfectly.
The Golden Rule: Garbage In, Garbage Out (GIGO)
This is the most important concept in this entire guide. It means that the quality of your output is determined by the quality of your input.
-
If you record a sloppy guitar take, no amount of editing will make it sound tight and professional. It will sound like an edited, sloppy take.
-
If you record a guitar DI signal that is too loud and distorted (we’ll cover this in detail), that distortion is permanent. It is digital cancer, and you cannot remove it. The take is unusable.
-
If your source sounds are bad (a weak drum sample, a fizzy guitar preset), your mix will be a constant, losing battle to make them sound good.
Actionable Step: Make a promise to yourself right now. "I will get it right at the source." Spend the extra hour practicing a difficult passage. Do another take. Tune your guitar between every single take. This discipline is what separates the amateurs from the pros.
The Enemy: Option Paralysis
Modern technology has given us infinite choices. Hundreds of amp simulators, thousands of drum samples, endless plugins. This is a blessing and a curse. For a beginner, it can lead to "option paralysis," where you spend so much time trying out different sounds that you never actually make any music.
The Cure: Choose Your Weapons and Learn Them
You do not need 50 different amp sims. You need one or two great ones. You do not need 100 snare samples. You need a handful of amazing ones.
The goal of Develop Device is to cut through this noise. Instead of giving you a million raw, unprocessed sounds, we provide curated, mix-ready collections that have already been vetted and processed by an expert. This dramatically narrows your choices to only include sounds that are proven to work, freeing you to focus on your creativity.
Embrace the Learning Curve
You will not be an expert overnight. Your first mix will likely not be very good. That is okay. Every single one of your heroes started out making bad mixes. The key is to finish what you start. A finished, imperfect song is infinitely better than a "perfect" song that never gets completed.
Actionable Step: Commit to finishing every project, even if you don't think it's perfect. Then, listen back, identify one or two things you could have done better, and apply that knowledge to your next project. This cycle of Finish -> Analyze -> Improve -> Repeat is the fastest way to get better.
Chapter 2: Your Command Center - Setting Up Your Studio
Your physical environment directly affects your ability to make good creative and technical decisions. Let's build a functional workspace, even on a shoestring budget.
The Room: Your First and Most Important Piece of "Gear"
An untreated, square bedroom is the worst possible environment for mixing music. Sound waves bounce off the hard, flat surfaces (walls, ceiling, floor) creating a chaotic mess of echoes and frequency imbalances. You cannot trust what you are hearing. But you don't need to spend a fortune to make a massive improvement.
Problem 1: Early Reflections (The Stereo Image Killer)
-
What they are: The very first sound waves that bounce off your side walls and desk and reach your ears, just milliseconds after the direct sound from your speakers. They smear your stereo image, making it impossible to accurately judge panning and space.
-
The FREE Fix (Positioning):
-
Your desk and speakers should be placed against the shorter wall of your room, firing down the longest dimension. This gives sound waves more time to dissipate.
-
Create an equilateral triangle between your head and your two speakers. The distance between the speakers should be the same as the distance from each speaker to your head.
-
Your speakers' tweeters (the small high-frequency drivers) should be at the same height as your ears.
-
-
The BUDGET Fix (Absorption Panels):
-
Sit in your listening position. Have a friend hold a mirror flat against the left wall and slide it back and forth. Wherever you can see the reflection of the left speaker in the mirror, that is a primary reflection point. Mark it.
-
Repeat the process for the right wall. Also, do it for the ceiling area between you and your speakers.
-
Hang something soft and thick at these points. It can be a thick blanket, a duvet, or even purpose-made acoustic foam. This will absorb those damaging reflections.
-
Problem 2: Bass Buildup (The Mud Maker)
-
What it is: Low-frequency (bass) sound waves are powerful and build up in the corners of your room. This creates "bass traps" where some bass notes will sound incredibly loud and others will disappear completely.
-
The BUDGET Fix: Anything big and dense you can put in the corners of your room will help. A bookshelf filled with books, a stack of boxes filled with clothes, a mattress stood on its end. It sounds silly, but it works by breaking up and absorbing those bass waves.
The Core Equipment: A Beginner's Guide
You don't need a mountain of gear. You need a few key, high-quality items.
1. The Computer: The brain of your studio. Most modern Macs or PCs are powerful enough for audio production. The most important specs are:
-
RAM: 16GB is a good starting point. 32GB is ideal. RAM is crucial for running large drum sample libraries.
-
Processor (CPU): A modern multi-core processor (Intel i5/i7/i9 or AMD Ryzen 5/7/9) is essential for handling many plugins at once.
-
Storage (SSD): A Solid State Drive (SSD) is non-negotiable. It will make your computer, your DAW, and your sample libraries load dramatically faster than a traditional hard disk drive (HDD).
2. The Audio Interface: Your Gateway to Sound
-
What it does: An audio interface is a small box that converts the analog electrical signal from your guitar into digital data your computer can understand (this is called Analog-to-Digital Conversion, or A/D). It also does the reverse, converting digital data from your computer back into an analog signal your speakers or headphones can play (Digital-to-Analog Conversion, or D/A).
-
What to look for in your first interface:
-
At least one "Instrument" or "Hi-Z" input. This is a special input designed for the signal from an electric guitar or bass.
-
At least one microphone input with "Phantom Power." You'll need this for recording vocals later.
-
A headphone output.
-
Main outputs for your speakers.
-
-
Don't obsess over "preamp quality" for your first interface. The preamps in modern budget interfaces from brands like Focusrite, PreSonus, Audient, and Steinberg are all incredibly clean and more than good enough for professional results.
3. The DAW: Your Virtual Studio
-
What it is: A Digital Audio Workstation (DAW) is the software program where you will do all your recording, editing, and mixing. It's like a word processor, but for sound.
-
The Big Secret: They all sound the same. The choice of DAW is 100% about workflow and which one feels most intuitive to you.
-
Great Beginner Options:
-
Reaper: Incredibly powerful, fully customizable, and has a very generous evaluation period and affordable license. A huge favorite among metal producers.
-
Studio One (by PreSonus): Known for its fast, drag-and-drop workflow. Very intuitive for beginners.
-
Cubase: A long-standing industry standard with powerful MIDI and audio editing features.
-
Pro Tools: The "industry standard" in major commercial studios, but can have a steeper learning curve.
-
-
Actionable Step: Download the free trials for Reaper and Studio One. Spend a day with each. Choose the one that "clicks" with you, then commit to learning it inside and out.
4. Monitors and Headphones: Your Truth Tellers
You need to be able to hear what you're doing accurately.
-
Headphones: For a beginner, a good pair of studio headphones is arguably more important than speakers. They remove the sound of your untreated room from the equation, allowing you to hear details clearly.
-
Look for "Closed-Back" headphones for recording. These prevent sound from leaking out and being picked up by your microphone. The Audio-Technica ATH-M series (M20x, M40x, M50x) and the Beyerdynamic DT 770 Pro are industry standards.
-
-
Studio Monitors (Speakers): Eventually, you will need studio monitors. Mixing on headphones alone can lead to strange-sounding mixes because you can't judge the stereo image and low-end properly.
-
What to look for: "Near-field" monitors are designed for listening at close distances (like in your equilateral triangle setup). Don't worry about size; 5-inch monitors are perfect for a small bedroom studio. Brands like Yamaha (HS5), KRK (Rokit 5), and PreSonus (Eris E5) are excellent starting points.
-
Part 2: The Raw Ingredients - Capturing a Perfect Performance
Now that our command center is operational, it's time to create our raw materials. Remember the golden rule: Garbage In, Garbage Out. This stage is all about capturing the cleanest, highest-quality source audio possible.
Chapter 3: The DI Signal - Your Most Important Recording
This is the single most important technical chapter in this guide. Understanding and mastering the DI signal is the key that unlocks professional-sounding guitars and bass.
What is a DI Signal?
DI stands for Direct Input. It is the raw, clean, unprocessed sound of your electric guitar or bass, recorded directly into your audio interface, with no amplifier or effects. It sounds thin, weak, and buzzy on its own. It sounds like this: [buzzy, thin guitar sound].
So why is this ugly sound so important? Flexibility.
Because the signal is completely clean, you can change the sound of the amplifier, the speaker cabinet, and the effects after you have recorded the part. You can take one perfect DI performance and try it with 50 different virtual amp setups without ever having to play the guitar again. This is called re-amping, and it's the foundation of all modern metal production.
How to Record a Perfect DI Signal: A Step-by-Step Guide
-
Plug In Correctly: Plug a standard 1/4" instrument cable from your guitar directly into the "Instrument" or "Hi-Z" input on your audio interface. Do not plug it into a "Mic" or "Line" input. The Hi-Z input is specifically designed for the high impedance of guitar pickups and preserves your high-frequency content (your "sparkle").
-
Open Your DAW: Create a new audio track. Make sure the input for this track is set to the correct input on your interface where your guitar is plugged in.
-
Arm the Track: "Arming" the track (usually by clicking a small 'R' button) tells the DAW to get ready to record on this track. You should now be able to hear your thin, buzzy DI signal.
-
GAIN STAGING: The Most Crucial Step.
-
What it is: Gain staging is the process of setting the perfect input level.
-
The Enemy: Clipping. If your input level is too high, it will overload the A/D converter in your interface. This creates a nasty, harsh digital distortion called clipping. It is permanent and cannot be removed. It will ruin your recording. In your DAW, the level meter will hit the very top and turn red. Red is death.
-
The Goal: You want a strong, healthy signal that has plenty of "headroom" (space before it clips).
-
The Process:
-
On your guitar, turn the volume knob all the way up.
-
Play the absolute loudest and hardest you will during the song. This is usually a fast, palm-muted riff on the lowest strings.
-
While you are playing, look at the input meter on your DAW track. Slowly turn up the "Gain" or "Trim" knob on your audio interface.
-
Adjust the gain knob until the meter is peaking (hitting its highest point) at around -12dBfs. Some peaks might hit -10dBfs, and quieter parts might be around -18dBfs. This is the perfect range. It's miles away from clipping, but plenty loud enough to be free from any unwanted noise.
-
-
-
Hit Record: You are now ready to capture your perfect DI performance.
Troubleshooting Common DI Problems
-
Problem: "My DI signal has a loud hum or buzz."
-
Cause 1: Single-Coil Pickups. Guitars with single-coil pickups (like Stratocasters or Telecasters) are notorious for picking up electrical interference. The solution is to use a guitar with humbucking pickups, which are standard for metal and are designed to "buck the hum."
-
Cause 2: Ground Loop. This can happen if your computer, interface, and other devices are plugged into different power outlets. Try plugging everything into a single power strip.
-
Cause 3: Bad Cable. A poorly shielded or damaged guitar cable can act like an antenna for noise. Try a different cable.
-
The Fix-It-in-Software Tool: The Noise Gate. A noise gate is a plugin that acts like an automatic volume knob. It mutes your signal when the level drops below a certain point (the "threshold"). Place it as the very first plugin on your DI track. Set the threshold so the gate mutes the hum when you aren't playing, but opens instantly when you play a note.
-
-
Problem: "My DI signal sounds weak and muffled, even with the gain turned up."
-
Cause 1: Dead Battery. If you have active pickups (like EMGs or Fishman Fluence), they require a 9V battery. A dying battery will result in a weak, distorted signal. Change your battery!
-
Cause 2: Old Strings. Old, dead guitar strings have very little high-frequency content. Your tone lives in your strings. For recording, always use a fresh set of strings.
-
Cause 3: Guitar Volume Knob. This sounds silly, but you'd be surprised how often it happens. Make sure the volume knob on your guitar is turned all the way up.
-
By mastering the art of the DI signal, you have created the perfect raw material. Now, we can move on to programming the rhythmic foundation.
Chapter 4: Programming Apocalyptic Drums - The Heartbeat of Metal
In modern metal, drums need to be a perfect marriage of machine-like precision and human groove. They are the engine that drives the entire song. We will achieve this using a drum sampler plugin and MIDI.
What are MIDI and Drum Samplers?
-
MIDI (Musical Instrument Digital Interface): MIDI is not audio. It is data. It's a set of instructions that tells a virtual instrument what to play. A MIDI note contains information like:
-
What note to play (e.g., C1, which might be a kick drum).
-
When to play it (the timing).
-
How long to play it for.
-
Velocity: How hard to play it (from 1 to 127). This is the most important parameter for realism.
-
-
A Drum Sampler: This is a plugin that houses a massive library of pre-recorded, high-quality drum sounds (samples). It reads the MIDI data you program and plays the corresponding drum sample at the specified time and velocity.
Choosing Your Drum Sampler
For a beginner, the choices can be overwhelming. Here are the top contenders and what makes them special:
-
Toontrack Superior Drummer 3: This is the undisputed king of drum samplers. It's a universe of its own. Its samples are incredibly detailed (recorded with multiple microphones and at many different velocity layers), and it features a built-in mixer that is as powerful as an entire DAW. This is the choice for ultimate control and realism. The Develop Device Superior Drummer 3 Presets are designed to harness this immense power instantly.
-
Toontrack EZdrummer 3: The streamlined, easy-to-use sibling of SD3. It’s designed for songwriters who want to get a great drum sound quickly. It comes with a huge library of pre-made MIDI grooves you can drag and drop to build your song. You can get incredible results fast, and our EZdrummer 3 Templates make it even easier to get a professional mix.
-
GetGood Drums (GGD): These libraries are created by top metal producers (like Adam "Nolly" Getgood and Misha Mansoor). Their key feature is that they are heavily "pre-processed." They are designed to sound like a finished record right out of the box, requiring very little additional mixing. Our GGD Drum Templates help you integrate these powerful sounds into your DAW seamlessly.
-
Steven Slate Drums (SSD): Another long-standing favorite, known for its punchy, mix-ready sounds that cut through a dense mix easily.
The Art of Programming: A Beginner's Guide
You will program your drums in your DAW's "Piano Roll" or "MIDI Editor." This is a grid where the vertical axis represents the notes (each drum piece) and the horizontal axis represents time.
Step 1: The Foundation - Kick and Snare
The kick and snare are the skeleton of your beat.
-
The Kick Drum: In a standard 4/4 metal beat, the kick often plays on all four downbeats (1, 2, 3, 4) or follows the fast, palm-muted rhythm of the guitars. For a solid foundation, keep the velocity of these main kick hits high and consistent, around 120-127.
-
The Snare Drum: The snare typically provides the backbeat, hitting on beats 2 and 4. These are the hits you headbang to. Set the velocity for these main snare hits to be very high (125-127) to give them maximum impact.
Step 2: The Timekeeper - Hi-Hats and Cymbals
This is where realism is born or dies. Never program all your hi-hats at the same velocity. A real drummer never hits the hi-hat with the exact same force every time.
-
The 8th Note Pattern: A common pattern is to have hi-hats playing on all the 8th notes (1 & 2 & 3 & 4 &).
-
Accenting: Program the hi-hats on the downbeats (1, 2, 3, 4) to be a higher velocity (e.g., 110) and the ones on the "ands" to be a lower velocity (e.g., 85). This instantly creates a groove.
-
Humanization: Most DAWs have a "humanize" function that will randomly vary the timing and velocity of your MIDI notes by a small amount. Use this sparingly on your hi-hats and cymbals to make them feel less robotic.
Step 3: The Groove - Ghost Notes
-
What they are: Ghost notes are the very quiet snare drum hits that a drummer plays between the main backbeats. They add a layer of rhythmic complexity and groove.
-
How to program them: Sprinkle in some extra snare hits between the main backbeats, but set their velocity extremely low (e.g., 20-50). They should be felt more than heard.
Step 4: The Power - Fills and Crashes
-
Crash Cymbals: Use crash cymbals to mark the beginning of new sections (like when a verse transitions to a chorus). Place them on beat 1. To make it more realistic, always program a kick drum hit at the exact same time as a crash cymbal. A real drummer naturally does this for balance and power.
-
Fills: A drum fill is a short, transitional pattern that signals the end of a phrase. A simple but effective fill is a "roll" down the toms (e.g., hitting the high tom, then mid tom, then floor tom) leading into a crash on beat 1 of the next section.
Programming drums can be tedious. A great way to start is by using the pre-made MIDI grooves that come with samplers like EZdrummer 3, or by purchasing dedicated metal MIDI groove packs. You can drag and drop these into your project and then edit them to fit your song perfectly.
Part 3: The Forge - Sculpting Your Instruments of War
We have our perfect raw materials: a pristine guitar DI and meticulously programmed drums. Now we enter the forge. This is where we will use software to transform these raw ingredients into massive, powerful, and professional sounds.
Chapter 5: The God-Tier Metal Guitar Tone - A Deep Dive
This is the heart and soul of our genre. Let's build a world-class guitar tone from scratch, explaining every component in excruciating detail.
The Signal Chain: The Four Pillars of Tone
A modern metal guitar tone is a chain of four distinct processing stages. The order is critical.
DI Signal -> [Pillar 1: Boost Pedal] -> [Pillar 2: The Amplifier] -> [Pillar 3: The Cabinet/IR] -> [Pillar 4: Post-EQ]
We will load these as plugins on our DI guitar track in our DAW.
Pillar 1: The Boost Pedal - The Secret to Tightness
-
What it does: We place a virtual overdrive pedal before the amplifier. Its purpose is not to add distortion, but to shape the EQ of the DI signal before it hits the amp. Specifically, it tightens the low-end and boosts the mids.
-
The Classic Weapon: A model of the Ibanez Tube Screamer (TS808 or TS9).
-
The Counter-Intuitive Settings (Memorize These):
-
DRIVE / GAIN: Set to 0 or as low as it can go. We don't want distortion from the pedal.
-
TONE: Set this between 50% and 80%. This is the magic control. It acts as a filter, cutting some of the muddy low frequencies and pushing the clear midrange frequencies forward.
-
LEVEL / VOLUME: Set to 100% or maximum. This boosts the overall level of your DI signal, hitting the input of the virtual amplifier harder. This makes the amp feel more responsive and aggressive.
-
-
The Result: Without a boost, your palm-muted riffs will sound "flubby" and indistinct. With the boost, they will be razor-sharp, tight, and articulate. This is a non-negotiable step for almost all modern metal tones.
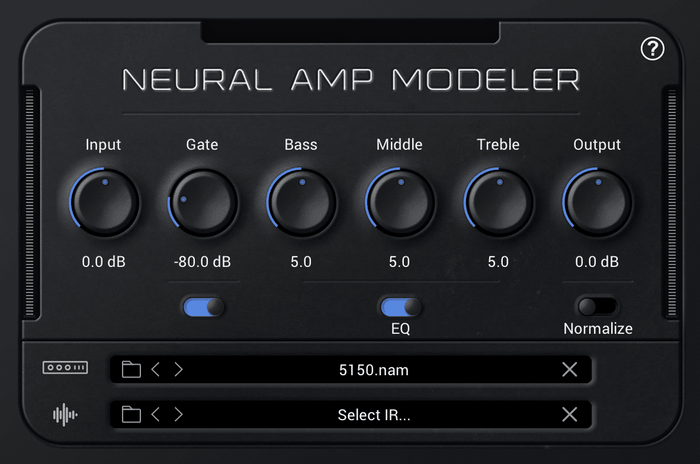
Pillar 2: The Amplifier - The Heart of the Beast
The amplifier simulator (amp sim) is what provides the core character and distortion of your tone. Let's look at the most legendary metal amps and how to use them.
The 5150/6505 Family: The Sound of Modern Metal
-
The Legend: Originally designed by Peavey with Eddie Van Halen, the 5150 (and its successor, the 6505) defined the sound of metal from the 90s through today. It's known for its immense, saturated gain, aggressive midrange bite, and incredible tightness.
-
Used by: Almost everyone. From Machine Head and In Flames to Gojira, Trivium, and Periphery.
-
Beginner's Settings:
-
Gain: Don't turn the gain all the way up! This is a common mistake that leads to a fizzy, compressed mess. Start with the gain around 4-6 (out of 10). With the boost pedal in front, this will be more than enough.
-
EQ: The 5150's EQ is notoriously interactive. Start with Bass at 6, Mids at 5, and Treble at 7. Use the "Presence" and "Resonance" knobs to fine-tune the high-end sizzle and low-end thump.
-
-
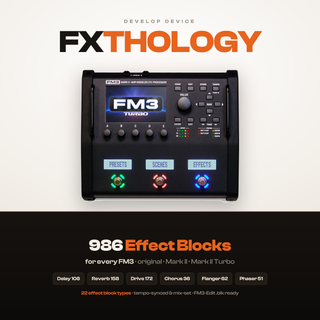
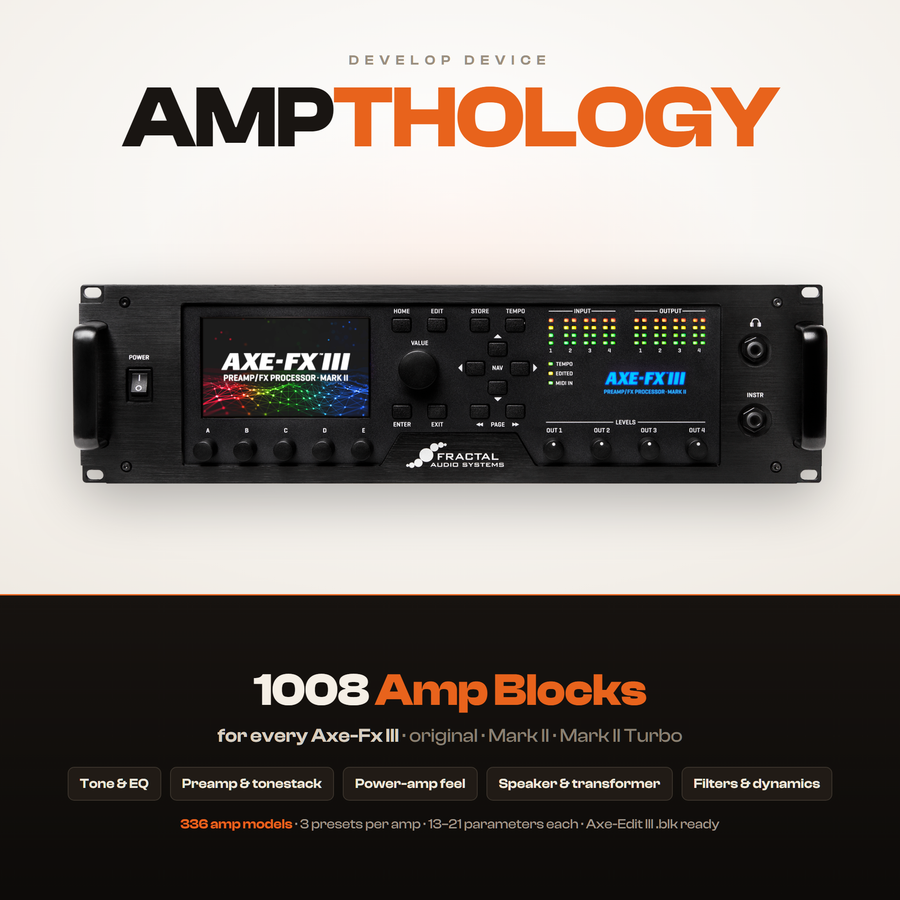
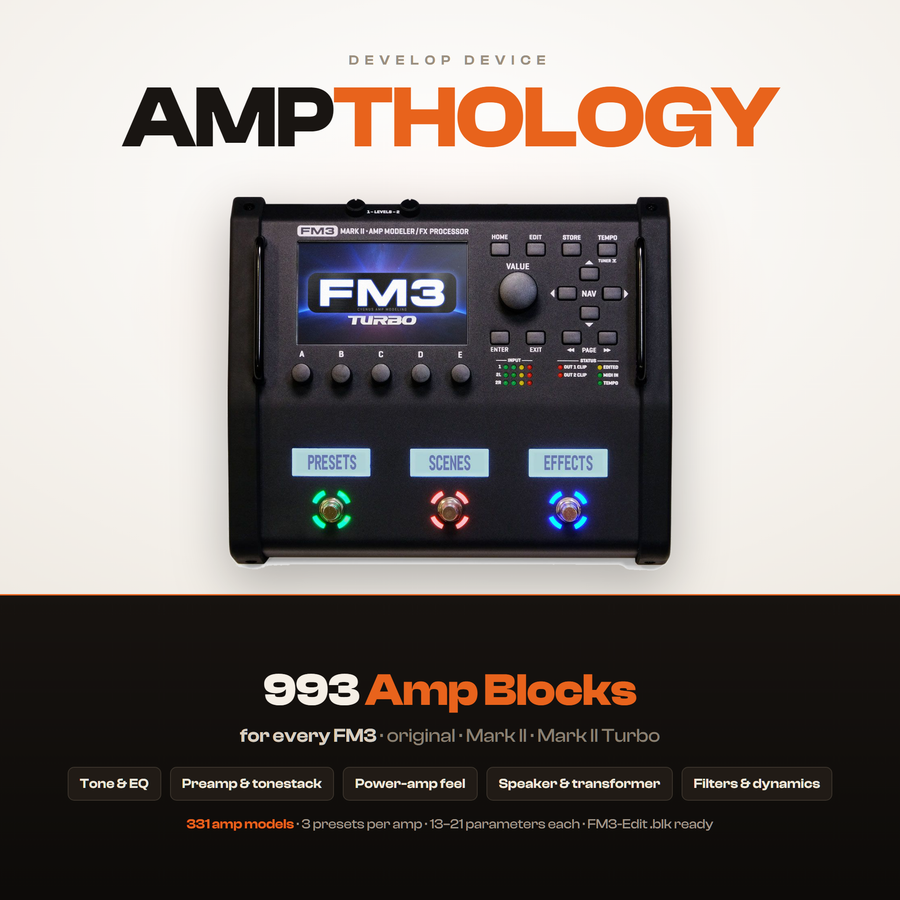
The Shortcut: Dialing in a 5150 can be tricky. A professionally made preset is your best friend. The Develop Device Fractal Audio presets, for example, feature dozens of variations on the 5150 sound, perfectly EQ'd and ready for any mix. You'll find them across our entire range, from Axe-Fx III to FM3/FM9.
The Mesa/Boogie Dual/Triple Rectifier Family: The Sound of Aggression
-
The Legend: The Mesa "Recto" defined the sound of 90s and 2000s hard rock and nu-metal. It’s known for a more "scooped" sound (less midrange) with a massive, booming low-end and a sizzling, angry high-end.
-
Used by: Metallica, Korn, Rammstein, early Linkin Park.
-
Beginner's Settings:
-
Channel: Use the "Red" channel (Modern High Gain).
-
Gain: Like the 5150, be careful not to overdo it. Start around 6-7.
-
EQ: The classic "smiley face" EQ works well here. Bass at 7, Mids at 4, Treble at 7. This creates that classic scooped sound.
-
-
The Shortcut: Taming the Rectifier's massive low-end can be difficult for a beginner. Our Line 6 Helix presets and Neural DSP Quad Cortex captures feature perfectly tamed Rectifier tones that have all the power without the mud.
Other Notable Amps:
-
Diezel VH4/Herbert: A German high-gain monster known for its hi-fi clarity and tightness.
-
ENGL Powerball/Fireball: Another German classic, famous for its searing high-gain tones.
-
Marshall JCM800/900: The sound of classic 80s metal. Less gain on its own, but takes a boost pedal beautifully for thrash tones.
Pillar 3: The Cabinet & IR - The Most Important Pillar
This is the step that most beginners get wrong, and it is the single most important part of your entire tone.
-
The Problem: The raw sound from an amplifier's output (without a speaker) is a harsh, fizzy, horrible buzz. It's completely unusable. A real guitar speaker cabinet doesn't just make the sound louder; it acts as a complex filter, shaping the sound dramatically.
-
The Solution: The Impulse Response (IR).
-
What it is (The Simple Analogy): Imagine taking a photograph of a sound. An IR is a sonic photograph of a specific speaker, in a specific cabinet, being recorded by a specific microphone placed in a specific position. This "photograph" file captures the unique filtering effect of that entire setup.
-
How it works: We use a plugin called an "IR Loader" after our amp sim. We load the IR file into it, and it processes our buzzy amp sim signal, making it sound exactly as if it were being played through that real-world cabinet setup.
-
-
Why it's SO important: Changing your IR will change your final tone MORE than changing your amplifier. You can make a 5150 amp sim sound dark and warm or bright and aggressive just by changing the IR.
The Variables that Make Up an IR:
-
The Speaker: The most common speaker for metal is the Celestion Vintage 30 (V30). It has a prominent, aggressive midrange that cuts through a dense mix.
-
The Cabinet: A 4x12 (four 12-inch speakers) cabinet from a brand like Mesa/Boogie or Orange will sound bigger and have more low-end than a 2x12 cabinet.
-
The Microphone: The Shure SM57 is the undisputed champion. It has a bright, aggressive character. Blending it with a warmer, darker ribbon microphone like a Royer R-121 is a classic pro technique to get both bite and body.
-
The Mic Position: Moving the microphone even one inch can dramatically change the sound. Closer to the center of the speaker cone is brighter; further out is darker.
The Shortcut That Will Save Your Sanity:
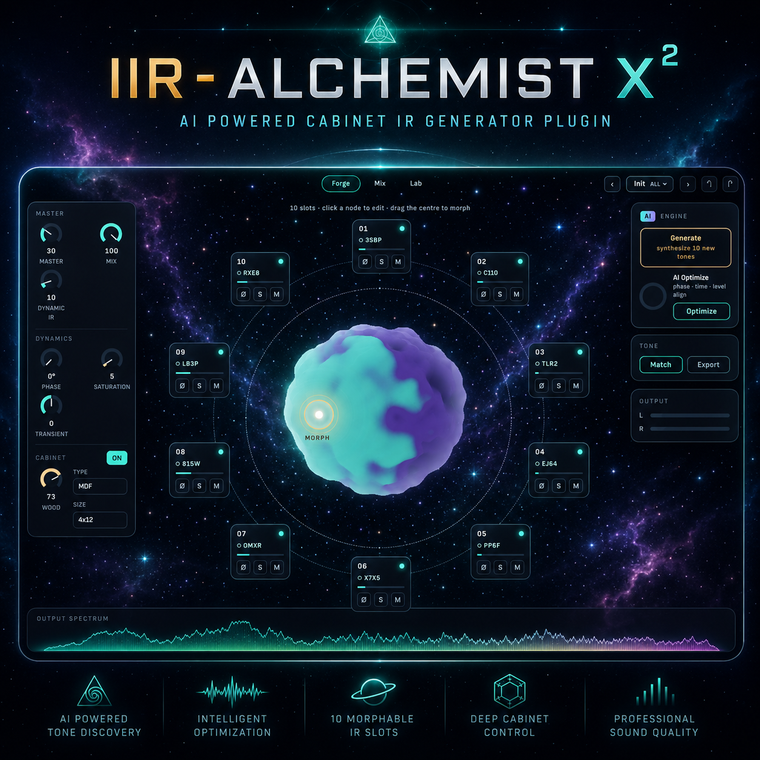
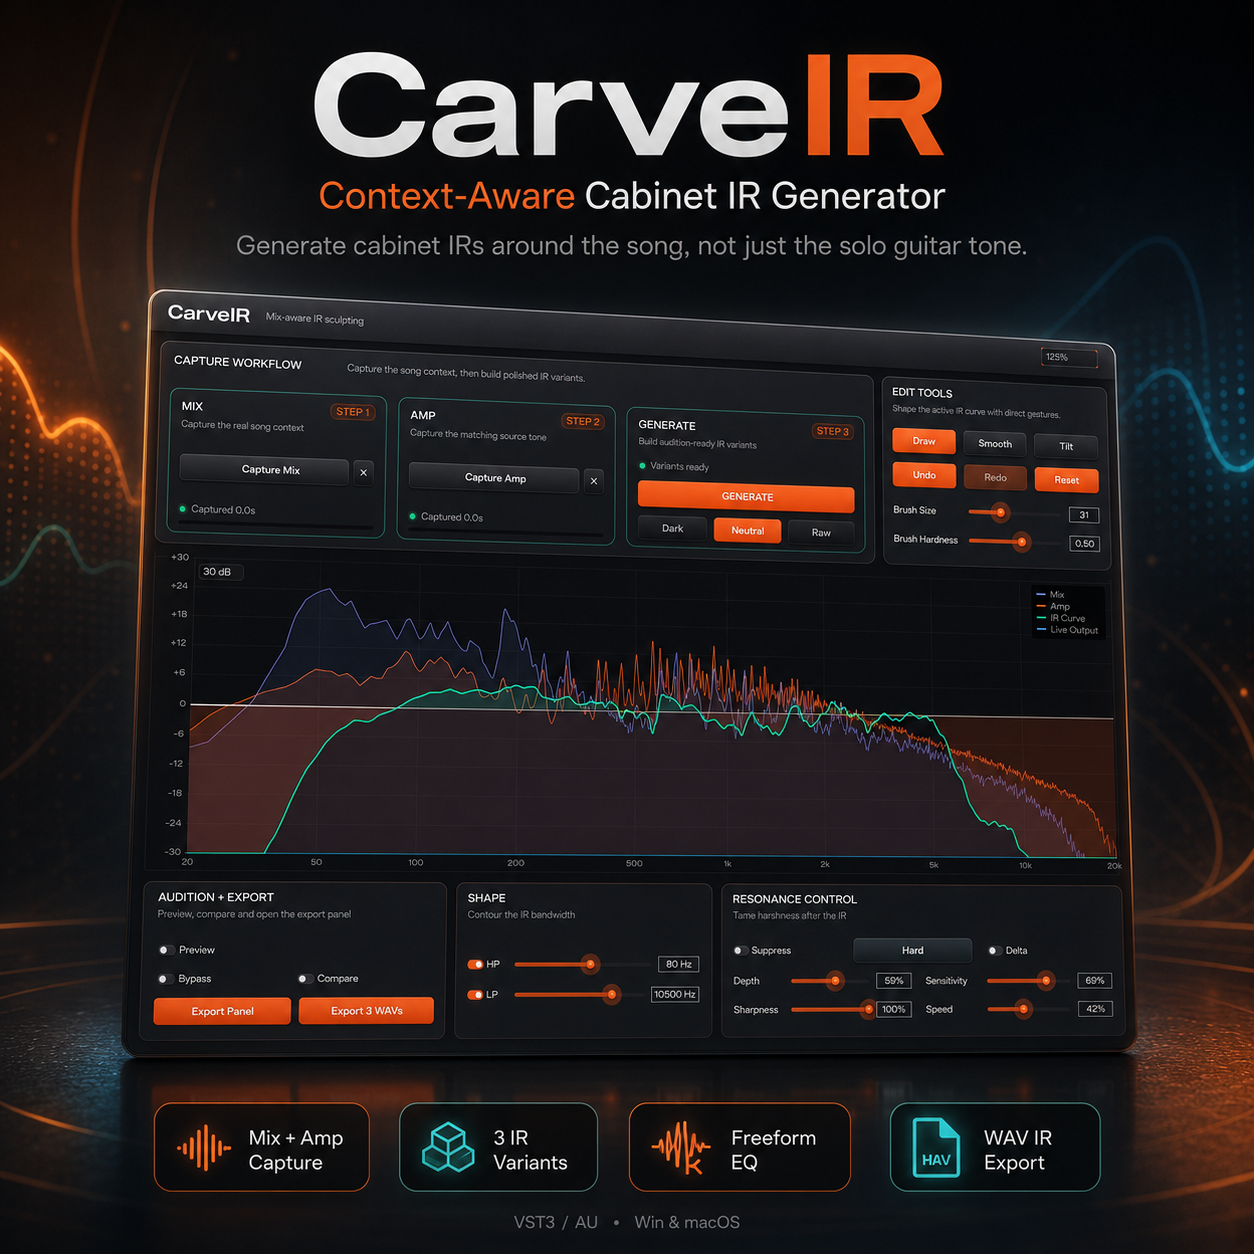
As a beginner, you do not want to get lost trying to find the perfect combination of thousands of single IR files. It is infinitely better to use professionally crafted IR blends. Our Develop Device Cabinet IRs are not just single mic captures; they are meticulously mixed and EQ'd blends of multiple microphones on multiple speakers, designed by a professional producer to be perfectly balanced and mix-ready from the moment you load them. This allows you to get the sound of a pro-studio mic setup without any of the guesswork.
Pillar 4: Post-EQ - The Final Polish
This is the final step in our tone-crafting chain. We use an Equalizer (EQ) plugin after the IR loader to make some final, subtle tweaks to help the guitar sit in a full mix.
-
The High-Pass Filter (HPF): The Unmuddy-inator. This is non-negotiable. A high-pass filter cuts all frequencies below a certain point. Set it to cut everything below 100Hz-120Hz. Your guitars have no useful information in this deep sub-bass region. It's just mud and rumble that will clash with your bass guitar and kick drum. This one move will make your mixes instantly cleaner.
-
The Low-Pass Filter (LPF): The Fizz-Tamer. A low-pass filter cuts all frequencies above a certain point. A lot of the unpleasant "fizz" in a high-gain guitar tone lives in the very high frequencies. Try setting an LPF to cut everything above 10kHz-12kHz. This will make the tone sound smoother and more professional.
-
The Surgical Cut: If your tone sounds a bit "honky" or "boxy," try making a narrow cut in the 300-500Hz range.
Congratulations. You have just built a god-tier metal guitar tone from the ground up.
The Ultimate Shortcut: Professional Presets
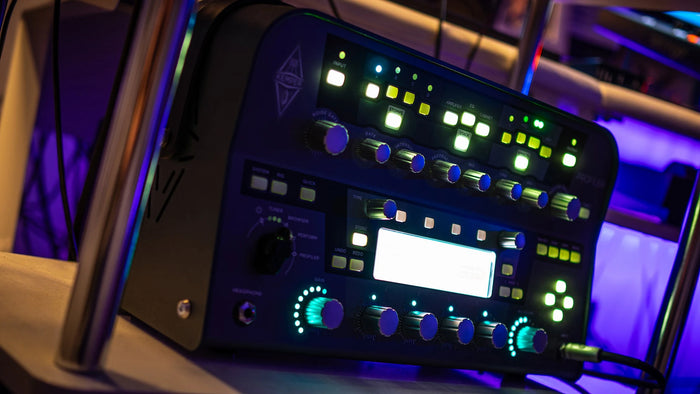
Now that you understand the entire complex process, you can appreciate the immense value of a professional preset. A single preset file, for example one from our Kemper Profiles or POD Go Presets collections, contains all four pillars—the boost pedal, the amp, the perfect IR blend, and the post-EQ—all pre-configured and ready to go. This is how you can achieve a world-class sound in seconds, not hours. It allows you to focus on what's most important: writing and playing music.
Chapter 6: Forging the Bass Tone - The Unsung Hero
An amazing bass tone is the secret weapon of a heavy mix. It must provide the foundational weight of the track while also being audible on small speakers. Most beginners make their bass either too boomy or completely inaudible. We will fix that with a powerful pro technique.
The Twin-Track Technique: Divide and Conquer
Instead of using one track for our bass, we will split it into two, each with a different job.
-
Record your bass DI using the exact same principles as your guitar DI (Hi-Z input, gain staging to -12dBfs).
-
Duplicate the track. You now have two identical copies of your bass DI performance. Name one "Bass Sub" and the other "Bass Grit."
Track 1: The "Bass Sub" - The Foundation
-
The Goal: This track will be the clean, deep, foundational low-end. It should be felt more than heard.
-
The Process:
-
Place an EQ plugin on this track. Use a Low-Pass Filter (LPF) and cut everything above 200Hz. You are isolating only the pure sub-bass frequencies.
-
Place a Compressor plugin after the EQ. Use heavy compression. You want to crush the dynamics so that every note is the exact same volume. This creates a solid, unwavering foundation for your song.
-
Important: Do NOT add any distortion to this track. Keep it panned dead center in your mix.
-
Track 2: The "Bass Grit" - The Definition
-
The Goal: This track will provide the midrange, the string noise, and the audible character of the bass. This is the part you'll hear on a phone speaker.
-
The Process:
-
Place an EQ plugin on this track. Use a High-Pass Filter (HPF) and cut everything below 200Hz. This removes the sub-bass, preventing it from clashing with your "Bass Sub" track.
-
Place an amp simulator plugin after the EQ. This is where you add the tone.
-
Classic Choices: An Ampeg SVT model is the rock and roll standard. For modern metal, a model of a Darkglass B7K pedal is perfect for aggressive, clanky tones.
-
Add Distortion: Don't be shy. Add a good amount of drive or gain. You want this track to be crunchy and audible. It will sound thin and nasty on its own, but that's the point.
-
-
The Final Step: Blending
-
Start your mix with only the "Bass Sub" track playing alongside the drums. It should provide a powerful low-end foundation.
-
Now, slowly bring up the fader for the "Bass Grit" track. You'll hear the bass magically start to appear in the mix, gaining definition and character without making the mix muddy. Adjust the volume of the "Grit" track until the bass sits perfectly. It should feel huge but also be easy to follow.
This two-track technique is one of the biggest "secrets" of professional metal mixing.
Part 4: The Assembly - The Art and Science of Mixing
We have forged our instruments of war. They are powerful and pristine on their own. Now, we must assemble them into a cohesive army. Mixing is the process of balancing the volume, frequency content, and spatial placement of all your tracks so they work together as one powerful, intelligible, and emotional piece of music. This section is a mini-mixing course for beginners.
Chapter 7: Mix Preparation - Setting Yourself Up for Success
A clean and organized project is a fast and efficient project. Don't just dive in.
Step 1: The Cleanup
-
Go through every recorded track. Delete any unused takes or noisy bits at the beginning and end of clips. Add short fades to the start and end of every audio clip to prevent any clicks or pops.
Step 2: Color and Organize
-
Color-code your tracks by instrument group. Make all your drum tracks blue, all your bass tracks purple, all your rhythm guitars red, all your lead guitars pink, all your vocals green. This makes navigating your project visually instantaneous.
Step 3: Create Buses (Groups)
-
A bus (or group track) is a track that combines the audio from several other tracks. This allows you to process an entire group of instruments at once.
-
Create the following buses:
-
DRUM BUS: Route the output of all your individual drum tracks to this bus.
-
BASS BUS: Route your "Bass Sub" and "Bass Grit" tracks here.
-
GTR BUS: Route all your rhythm and lead guitar tracks here.
-
VOCAL BUS: Route all your vocal tracks here.
-
-
Now, instead of adjusting 16 drum tracks, you can adjust the overall volume of your entire drum kit with just one fader: the DRUM BUS fader. This is a massive workflow improvement.
Chapter 8: The Static Mix - Your Most Important Move
Before you reach for a single fancy plugin, you must create a static mix. This is the process of creating a basic balance using only the volume faders and pan knobs.
-
Set all your track faders to zero.
-
Find the loudest, busiest section of your song (probably the final chorus) and loop it.
-
Push Up the Foundation: Bring up your DRUM BUS fader to a moderate level (e.g., so it's peaking around -10dBfs on your master output). Then bring up your BASS BUS fader until it locks in perfectly with the kick drum.
-
Add the Walls of Sound: Bring up your GTR BUS fader. Find the sweet spot where the guitars feel powerful and wide but aren't drowning out the drums and bass.
-
Place the Star: Bring up your VOCAL BUS fader. The lead vocal should sit clearly on top of everything else. It is usually the most important element.
-
Set the Stage with Panning:
-
Center: Kick, Snare, BASS BUS, and VOCAL BUS should almost always be dead center. They are the anchor of your mix.
-
Wide: Your main rhythm guitars should be panned hard left and hard right (100% L and 100% R). This creates the wide, powerful wall of sound.
-
Fill the Gaps: Pan your toms across the stereo field to simulate a real drum kit. Pan background vocals or harmony guitars slightly off-center (e.g., 30% L and 30% R) to keep them out of the way of the main elements.
-
If you spend 30 minutes getting your static mix to sound as good as possible, the rest of the mixing process will be infinitely easier. A great song, well-recorded and with a good static mix, is already 80% of the way to a great final product.
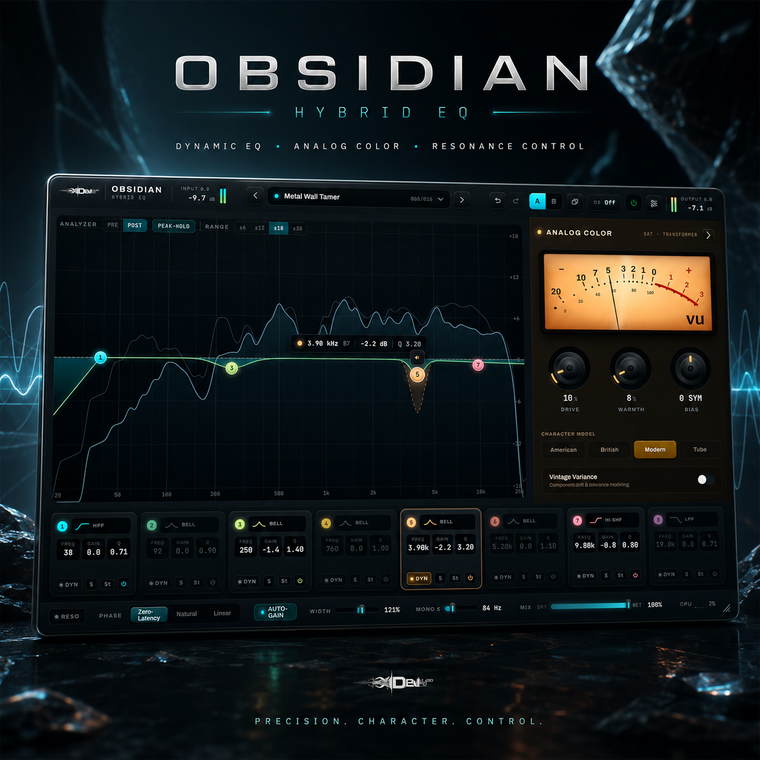
Chapter 9: The Sculptor's Tools - EQ and Compression for Beginners
EQ and Compression are the two most important tools in mixing. Let's demystify them.
Equalization (EQ): The Art of Frequency
-
What it is: An EQ allows you to turn the volume of specific frequencies up or down. Think of it like the "Bass" and "Treble" knobs on a home stereo, but with surgical precision.
-
The Golden Rule of EQ: Cut Before You Boost.
-
Our ears are easily fooled. If you boost a frequency, it always sounds "better" simply because it's louder. This is a trap that leads to harsh, unbalanced mixes.
-
A much better approach is subtractive EQ. If your vocal feels buried, instead of boosting the vocal's frequencies, ask yourself: "What instrument is masking the vocal?" It's probably the guitars. Go to the guitar bus, and make a small, wide cut in the frequency range where the vocal's clarity lives (around 2-4kHz). Magically, the vocal will appear to pop out of the mix, without you ever having touched the vocal track.
-
-
The Three Main EQ Moves:
-
The High-Pass Filter (HPF): We already used this on our guitars. It is your #1 tool for cleaning up mud. Use it on almost everything except the kick and bass sub. Vocals, cymbals, snare—they all have useless low-end rumble that can be removed.
-
The Surgical Cut (for fixing problems): If your snare drum has an annoying "ring" to it, you can use a very narrow EQ band to find that exact ringing frequency and turn it down.
-
The Broad Boost (for adding character): If you want to add some "air" or "sparkle" to your vocals or cymbals, you can use a gentle, wide "shelf" boost at 10kHz or above.
-
Compression: The Art of Dynamics
-
What it is: A compressor is an automatic volume controller. It reduces the dynamic range of a signal—the difference between the loudest and quietest parts.
-
Simple Analogy: Imagine you're watching a movie with loud action scenes and quiet dialogue. You're constantly turning the volume knob up and down. A compressor does that for you, automatically.
-
Why we use it in metal:
-
To Control Performance: A vocalist will naturally sing some words louder than others. A compressor evens this out, ensuring every word is intelligible. A bass player might hit some notes harder than others; a compressor creates a solid, consistent low-end.
-
To Add Punch and Aggression: By setting a compressor with a slow attack, you can let the initial "crack" of a snare drum through before the compressor clamps down. This exaggerates the punch of the drum.
-
To "Glue" Things Together: By putting a compressor on a bus (like your DRUM BUS or even your entire mix), it makes all the instruments "breathe" together. When a loud kick drum hits, the compressor momentarily turns everything else down slightly, creating a cohesive pumping effect.
-
-
The Two Most Important Knobs for a Beginner:
-
Threshold: This sets the level at which the compressor starts working. If the signal is below the threshold, the compressor does nothing.
-
Makeup Gain: Compression naturally turns the signal down. The makeup gain knob lets you turn the whole thing back up, so the compressed signal is just as loud as the original. This is how compression makes quiet parts louder.
-
Don't be intimidated by these tools. Load a compressor on your vocal track, set a low threshold so it's always working, and adjust the makeup gain. Hear how it brings the track "forward" and makes it more consistent. You'll learn by doing.
Chapter 10: Creating Space - Reverb and Delay
Without ambience, your mix will sound dry, two-dimensional, and like all the instruments are crammed into a tiny closet. Reverb and Delay are the tools we use to create a sense of three-dimensional space and depth.
-
The Golden Rule: Use Sends, Not Inserts.
-
Do not put a reverb plugin directly on your snare track.
-
Instead, create a new FX Bus (or "Send"). Put a reverb plugin on this bus and set the reverb to be 100% "wet" (meaning it's only the reverb sound, not the original dry sound).
-
Now, on your snare track, you will have a "send" knob. This knob controls how much of the snare's signal you want to send to the reverb bus.
-
Why? This is far more efficient for your computer. More importantly, you can now send multiple instruments (snare, vocals, lead guitar) to the same reverb bus. This makes it sound like they are all performing in the same physical space, which helps to "glue" your mix together.
-
-
Different Tools for Different Jobs:
-
Short Room Reverb: Create a send with a very short (0.5-second) room or ambience reverb. Send a little bit from all your drums to this. It will make the kit sound like it's in a real room without washing it out.
-
Plate Reverb: Create another send with a classic plate reverb (1.5-2 seconds long). This is beautiful on vocals.
-
Hall Reverb: Create a third send with a long, epic hall reverb (3-4 seconds long). Use this for your guitar solos to make them sound huge and majestic.
-
Stereo Delay: A stereo delay (or "ping-pong" delay) that bounces from the left to the right speaker is another fantastic effect for vocals and lead guitars. Try to sync the timing of the delay to the tempo of your song for a rhythmic effect.
-
Part 5: The Final Polish - Preparing for the World
Your mix is done. It's balanced, powerful, and clear. There is one final step before you can release your song to the world.
Chapter 11: Demystifying Mastering
Mastering is the final quality control process. It is the last step in the chain.
What Mastering IS:
-
It is the process of taking your final stereo mix file (a single WAV file) and giving it a final enhancement.
-
It involves subtle, broad-stroke EQ to correct any minor tonal imbalances.
-
It involves a final stage of compression or limiting to increase the overall perceived loudness to be competitive with other commercial releases.
-
It ensures your song sounds good on all playback systems, from earbuds to club speakers.
What Mastering IS NOT:
-
It is NOT mixing. You cannot fix a bad mix in mastering. If your snare is too quiet, that is a mixing problem. If your guitars are muddy, that is a mixing problem. You must go back into your mix session and fix it at the source. Mastering can only enhance what is already there.
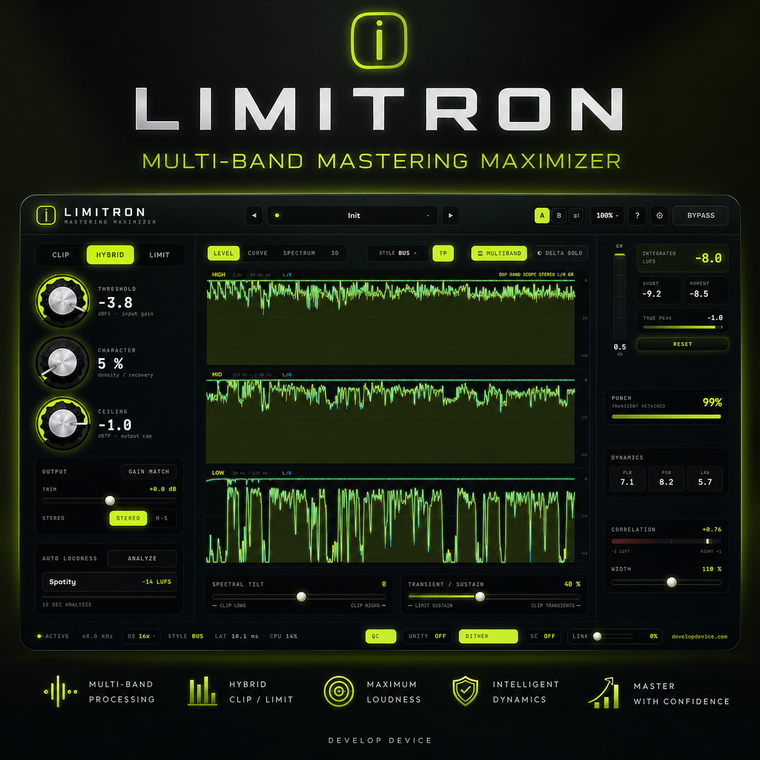
The #1 Tool in Mastering: The Limiter
-
What it is: A limiter is a type of hyper-aggressive compressor. Its job is to raise the overall volume of your track as much as possible without ever allowing the signal to go above 0dBfs and clip. It creates a "brick wall."
-
The Loudness War is Over: For years, artists and labels were in a "loudness war," using limiters to crush their music to be as loud as humanly possible. This is no longer necessary.
-
LUFS (Loudness Units Full Scale): Streaming services like Spotify and YouTube now use a system called "loudness normalization." They measure the average loudness of your track (in LUFS) and automatically turn it up or down to match their target level (usually around -14 LUFS).
-
What this means for you: If you crush your song with a limiter to make it super loud, Spotify will just turn it down. You will have sacrificed all the punch and dynamic range of your song for nothing.
-
A Good Target: Aim for an average loudness of around -10 to -12 LUFS on your master. This will be plenty loud and punchy but will still retain some healthy dynamics.
Should You Master Your Own Music?
You can absolutely learn to do basic mastering. The process typically involves a chain of: EQ -> Multi-band Compressor -> Limiter.
However, a professional mastering engineer provides two things you can't give yourself:
-
A Fresh, Objective Set of Ears: You have heard your song a thousand times. You are too close to it to be objective. A mastering engineer hears it for the first time and can instantly spot problems you've become deaf to.
-
A Perfect Room and High-End Gear: Their studio is acoustically perfect, and they use expensive, specialized analog gear that can add a final layer of polish and "glue" that is difficult to achieve with plugins alone.
For the absolute best results on your most important releases, hiring a professional is always a good investment. At Develop Device, we offer professional Mixing and Mastering services that combine decades of experience with world-class analog and digital tools to give your music the competitive edge it deserves.
Chapter 12: The Ultimate Shortcut - A Curated Arsenal
You have just absorbed a colossal amount of information. It is the complete roadmap. But it's a long road. It takes years of practice to master all these skills.
What if you could start your journey from 80% of the way there?
That is the entire philosophy behind every single product we offer at Develop Device.
-
When you load one of our guitar presets, you are not just loading a sound; you are loading a decade of expertise in amp modeling, IR blending, and post-EQ.
-
When you load one of our drum presets, you are loading hundreds of hours of work in mixing, routing, and processing.
These are not crutches; they are rocket boosters. They handle the deep technical science so you can focus on the art.
If you are serious about this journey and want to equip yourself with the entire library of tools and expertise mentioned in this guide, there is no better value on Earth than the Develop Device All-Access Pass.
It grants you immediate access to our entire, ever-growing catalog of presets for every major platform, every IR pack, and every drum template. It is a complete, professional studio-in-a-box. It is the key to unlocking the sound in your head and finally closing that gap between demo and devastation.
Thank you for joining us on this journey. The knowledge is now yours. The tools are available.
Now, go and create something that will shake the world.


Leave a comment
All comments are moderated before being published.
This site is protected by hCaptcha and the hCaptcha Privacy Policy and Terms of Service apply.