Drums. They are the beating heart of almost every modern recording. They are the foundation upon which the rest of the band stands. They can drive a song forward, make you want to dance, or add emotional weight to a ballad. But what separates an amateur-sounding recording from the professional, polished track you hear on the radio? Very often, it's the drum mix.
Poorly mixed drums can sound flat, lifeless, muddy, or get completely lost in the overall mix. Conversely, brilliantly mixed drums provide a track with energy, depth, punch, and a professional sheen.
Welcome to the ultimate drum mixing cheat sheet. This isn't just a list of quick tips. It's a comprehensive guide that will walk you through the entire process from A to Z. From basic preparation and setup, through detailed work with equalization and compression on each individual drum, to advanced techniques like parallel compression, saturation, and automation.
Our goal is to give you the knowledge and confidence to transform raw drum tracks into a solid, punchy, and cohesive foundation for your music. Buckle up, it's going to be a ride full of frequencies, dynamics, and creative decisions.
Chapter 1: The Non-Negotiable Fundamentals – Preparation and Mindset
Before you even touch your first equalizer, you need to prepare the battlefield. This preparatory phase is absolutely crucial and will save you hours of frustration in the later stages of the mix. Skipping these steps is like building a house without a foundation.
1.1 Source Quality is King
You can have the best plugins in the world, but the old saying holds true: "Garbage in, garbage out." With poorly recorded drums, you'll always be fighting fires and making compromises.
-
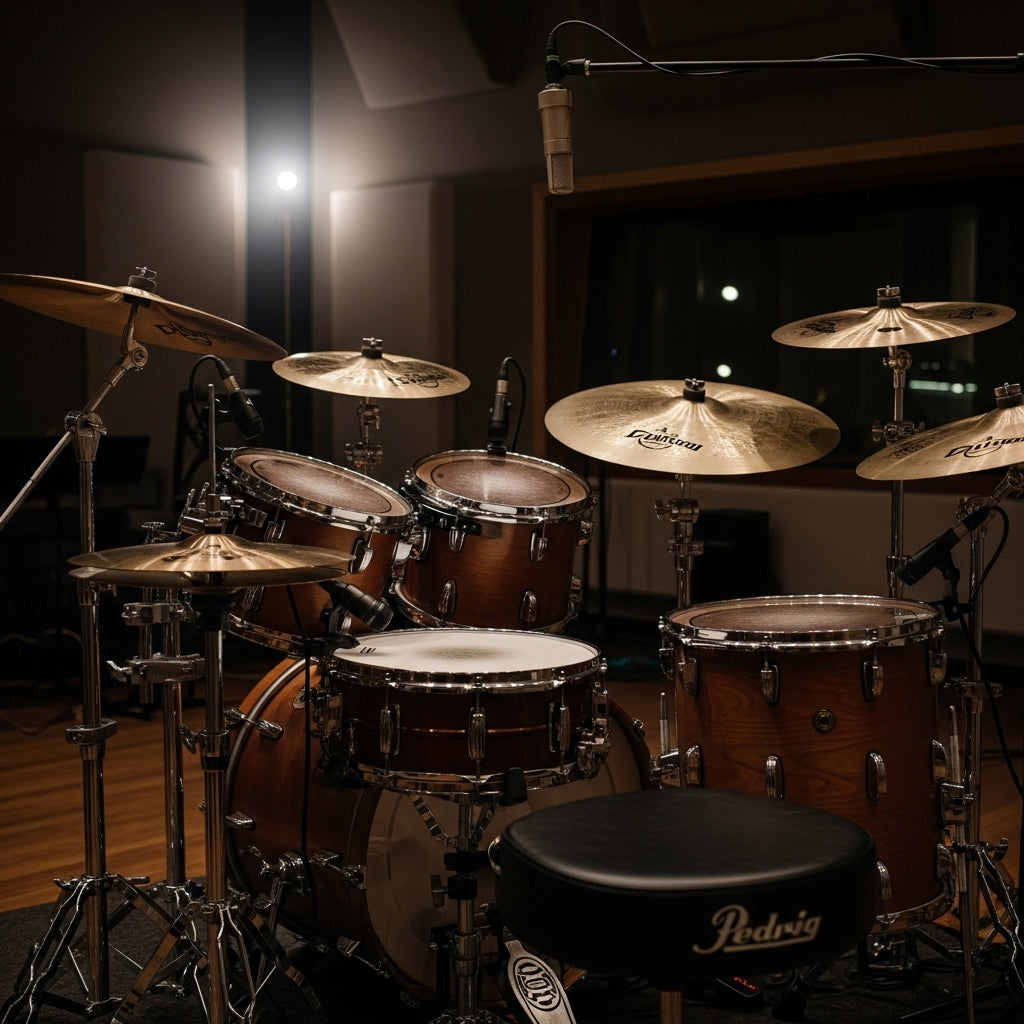
Acoustic Drums: If you're recording live drums, make sure they are well-tuned, the drummer is playing well, and the microphones are positioned correctly. Take time to eliminate bleed, although a little natural bleed can be desirable.
-
Electronic Drums and Samples: If you're working with samples, choose high-quality ones. Investing in a good sample library (like those from Slate Digital, Toontrack, GetGood Drums, etc.) will pay for itself many times over. Look for samples that already sound close to your vision from the start.
1.2 Organization: The Key to Sanity
A chaotic project is a recipe for disaster. Stay organized.
-
Track Naming: Rename all tracks logically. Instead of "Audio 01," have "Kick In," "Kick Out," "Snare Top," "Snare Bot," "Tom 1," "OH L," "OH R," etc.
-
Color Coding: Assign colors to different instrument groups. For example, all kick tracks blue, snare tracks red, toms green, cymbals yellow. Your brain will navigate the project much faster.
-
Track Order: Arrange your tracks in a way that makes sense to you. A common practice is from the lowest frequencies to the highest: Kick, Snare, Hi-Hat, Toms, Overheads, Room mics.
1.3 Gain Staging: The Foundation of a Clean Sound
Gain staging is the process of setting an optimal volume level for each track BEFORE you apply any effects. The goal is to have enough "headroom" – the space between the loudest peak of the signal and the maximum possible level (0 dBFS) – to avoid clipping.
-
Target Level: Aim for each track's average level (RMS) to be around -18 dBFS, with peaks not exceeding -10 to -6 dBFS.
-
Why is this important?
-
Preventing Digital Clipping: Any signal that exceeds 0 dBFS is digitally distorted, which sounds very unpleasant.
-
Proper Plugin Function: Many plugins, especially those emulating analog gear, are designed to work optimally around the -18 dBFS level. At higher levels, they may sound different than intended.
-
Headroom on the Master Bus: If you send all your tracks to the master too hot, the final bus will be instantly overloaded, and you'll have no room for mastering.
-
1.4 Creating a Drum Bus
Instead of sending all your drum tracks directly to the main master output, create a group track (Group/Bus) called "Drum Bus." Route the outputs of all individual drum tracks to this bus.
Advantages:
-
Volume Control: You can change the overall volume of the drums with a single fader.
-
Cohesive Processing: You can apply shared EQ, compression, or saturation to the entire drum kit. This helps to "glue" the individual parts together so they sound like one cohesive instrument.
Chapter 2: The Tools of the Trade – EQ, Compression, and Gating
Now comes the fun part. We'll start shaping the sound of the individual drums. The basic trio of tools for this task are the Equalizer (EQ), Compressor, and Gate.
2.1 Equalizer (EQ): Surgical Tool and Creative Brush
An EQ allows you to change the tonal balance of a track by boosting or cutting specific frequencies.
Basic EQ Rules:
-
Subtractive EQ First: It's often better to remove problematic frequencies than to boost good ones. Cutting creates space in the mix and makes the sound cleaner. If you want something to sound "brighter," first try cutting some low-mids on other instruments.
-
Use a High-Pass Filter (HPF): An HPF (also known as a Low-Cut) is your best friend. It removes unnecessary low frequencies. Apply it to everything that doesn't need sub-bass frequencies (everything except the kick and maybe the bass). You'll be surprised how much "mud" disappears from the mix.
-
Narrow Cuts, Wide Boosts: When removing problematic frequencies (resonances), use a narrow Q (bandwidth). When boosting desired frequencies, use a wider, more musical Q.
EQ Cheat Sheet for Individual Drums:
Kick Drum
-
Sub-bass (40-60 Hz): The "chest thump" feeling. Be careful, too much can overwhelm the mix.
-
Punch/Body (60-100 Hz): This is where the fundamental "thud" of the kick resides.
-
Boxiness (300-600 Hz): A common problem area. A slight cut here can clean up the sound and make it less "papery."
-
Beater Attack/"Click" (2-5 kHz): Boosting here emphasizes the sound of the beater hitting the skin. It helps the kick cut through the mix, especially in rock and metal music.
-
Air (10 kHz+): For an acoustic kick, there might be some "air" here, but it's often better to cut this area with a Low-Pass Filter (LPF) to make room for cymbals.
-
Body/Fatness (150-250 Hz): Gives the snare weight and "fatness."
-
Hollowness/Boxiness (400-900 Hz): Similar to the kick, a cut here can help. However, the characteristic "ring" you might want to keep can also live here.
-
Crack/Attack (3-6 kHz): The key area for punch. Emphasizes the stick hit.
-
Sizzle/Wires (8-12 kHz): Boosting here adds brightness and emphasizes the sound of the snare wires. You can also use a de-esser for control.
-
HPF: Don't be afraid to use an HPF up to 100-120 Hz to remove low-frequency rumble and make space for the kick.
Toms
-
Body/Resonance (100-300 Hz): Depends on the size of the tom. The fundamental tone is here.
-
Boxiness (400-800 Hz): Again, a prime candidate for a cut.
-
Attack (3-7 kHz): Emphasizes the stick hit and helps the tom cut through.
-
HPF and LPF: Use an HPF to remove low-frequency mud. An LPF can help separate the toms from the cymbals.
Hi-Hat and Cymbals
-
HPF is a must! Cut everything below 300-500 Hz. There's nothing useful in this range, just bleed from the kick and snare.
-
Harshness/Clang (2-4 kHz): Often a very piercing and unpleasant area. A slight cut here can be very beneficial.
-
Shimmer/Air (10-15 kHz): A boost here (preferably with a shelf EQ) will give the cymbals a beautiful, gentle sparkle.
-
De-Esser: If a hi-hat is too harsh and sibilant, a de-esser works great to tame specific problematic frequencies.
Overheads (OH)
Overheads capture the overall picture of the kit. There are two main approaches:
-
Cymbals as the Main Source: If you're using overheads primarily for the cymbals, use an aggressive HPF (up to 500 Hz) and focus on the brightness and width of the cymbals.
-
Full Kit Picture: If you want the overheads to form the basis of the entire kit's sound, use the HPF more gently (around 100-150 Hz). You'll need to make subtractive EQ cuts to make space for the close mics (e.g., a slight dip in the kick's attack area and the snare's body).
2.2 Compressor: Controlling Dynamics and Shaping Sound
A compressor reduces the dynamic range – the difference between the quietest and loudest parts of a signal. It can "even out" a sound, but it can also add punch and character.
Basic Compressor Parameters:
-
Threshold: The level at which the compressor starts working.
-
Ratio: How much the compressor reduces the signal that crosses the threshold. A 4:1 ratio means that for every 4 dB the signal goes over the threshold, the output will only be 1 dB louder.
-
Attack: How quickly the compressor reacts after the threshold is crossed. This is the most important parameter for shaping sound!
-
Release: How quickly the compressor stops working when the signal drops below the threshold.
-
Make-up Gain: Because the compressor reduces the volume of peaks, the resulting signal is quieter. Make-up gain compensates for this lost volume.
Compression Cheat Sheet for Individual Drums:
Kick Drum
-
Goal: Add punch and consistency.
-
Attack: Slow (approx. 30-100 ms). This lets the initial transient pass through unaffected, and the compressor clamps down on the "body" of the sound that follows. This makes the transient relatively louder and gives the kick "punch."
-
Release: Fast to Medium (approx. 50-150 ms), timed to "breathe" with the rhythm of the song.
-
Ratio: 3:1 to 6:1.
-
Gain Reduction: 3-6 dB.
Snare Drum
-
Goal: Emphasize the attack and/or lengthen the sustain.
-
Attack: Medium (10-30 ms) to emphasize the attack. A faster attack (1-5 ms) will clamp down on the transient and bring out the body and sustain, making it sound "fatter."
-
Release: Medium, set to the tempo.
-
Ratio: 4:1 to 8:1.
-
Gain Reduction: 4-8 dB.
Toms
-
Similar to the kick. Slow attack to emphasize the stick hit, fast release.
-
Ratio: 4:1.
-
Gain Reduction: 3-5 dB.
Overheads and Room Mics
-
Overheads: Often only need light compression for cohesion. Slower attack, faster release, low ratio (2:1), and just 1-2 dB of gain reduction.
-
Room Mics: Here you can get creative and aggressive! Fast attack, fast release, high ratio (10:1 or more), and massive gain reduction (10-20 dB). This creates an explosive, "pumping" room sound that you can blend underneath the main tracks for energy and size.
2.3 Gate/Expander: The Clean-up Crew
A gate completely mutes a signal that falls below a set threshold. It's a great tool for removing bleed, especially on toms that aren't played throughout the entire song.
-
Use on Toms: Set the threshold so the gate opens only when the tom is hit and closes as it decays. This removes bleed from cymbals and the snare.
-
Beware of Unnatural Sound: A gate set too aggressively can "chop off" the drum's natural decay and sound very artificial. Adjust the Attack, Hold, and Release parameters for a smooth opening and closing.
-
Alternative: Instead of a gate, you can manually edit out the bleed. In your DAW, simply cut out the parts of the audio track where the drum isn't playing. It's more time-consuming, but the result is often much more natural.
Chapter 3: Advanced Techniques for a Professional Sound
Once you've mastered the basics, it's time to take your mix to the next level with more advanced techniques.
3.1 Parallel Compression (New York Compression)
This is the holy grail for punchy drums. The principle is simple: instead of compressing the original signal, you create a copy of it, compress that copy extremely hard, and then gently blend it back in with the original, uncompressed signal.
How to do it:
-
Create a new aux/send bus (e.g., "Drum Crush").
-
Send the signal from your main Drum Bus (or individual drums) to this new bus.
-
Insert a compressor on the "Drum Crush" bus.
-
Set the compressor to extreme settings: fast attack, fast release, the highest possible ratio (20:1 or "All Buttons In" on a 1176 emulation).
-
Compress the signal so that the gain reduction meter is flying, hitting 10-20 dB of reduction.
-
Now, slowly raise the fader of the "Drum Crush" bus and blend this ultra-compressed signal underneath your main drum sound.
The Result: You get the best of both worlds. You retain the transients and dynamics of the original signal but add the weight, body, and energy of the compressed signal.
3.2 Saturation: Warmth and Harmonics
Saturation is a form of subtle distortion that adds new harmonic frequencies to the signal. This can "warm up," "thicken," and give the sound an analog character.
-
Types of Saturation:
-
Tape: Emulates the sound of recording to analog tape. It usually rounds off transients and adds "fatness" to the low-mids.
-
Tube: Emulates the sound of tube amplifiers. It adds pleasant even-order harmonics that "open up" the sound.
-
Transistor: Tends to be more aggressive and edgier.
-
Where to use it:
-
Subtle tape saturation on the entire Drum Bus can beautifully "glue" the sound together.
-
More aggressive saturation on a parallel bus (similar to parallel compression) can add incredible energy.
-
Apply it to individual tracks (e.g., the snare) to add character.
3.3 Phase Coherency
When you record a single source with multiple microphones (e.g., a kick drum with a mic inside and outside, or a snare with a mic on top and bottom), the waveforms from these mics may not be perfectly aligned in time. This is called a phase shift.
Consequences: If the signals are out of phase, they can cancel each other out, typically leading to a loss of low frequencies and a thin, weak sound.
How to check and fix it:
-
Listen: Solo the tracks you want to check (e.g., Kick In and Kick Out).
-
Polarity Invert: Most DAWs have a polarity invert button on the channel strip (often marked with the symbol ø). Try pressing it on one of the tracks. If the sound suddenly gains body and bass, you were out of phase.
-
Manual Nudging: Sometimes, a simple 180-degree flip isn't enough. You may need to manually move one track forward or backward by a few milliseconds to find the "sweet spot" where it sounds best. Zoom in on the waveforms and align them visually.
Don't forget to check the phase between:
-
Kick In / Kick Out
-
Snare Top / Snare Bottom (inverting the polarity on the bottom mic is almost always necessary here!)
-
Close Mics / Overheads
3.4 Creating Space: Reverb and Delay
Dry drums sound unnatural. We need to create a space for them to "live" in.
-
Use Send/Aux Buses: Never put reverb directly on a drum track as an insert. Create an aux bus for reverb and send signals from the individual drums to it. This gives you control over how much reverb each drum gets and ensures all drums are in the same "space," which glues them together.
-
Types of Reverb:
-
Room/Chamber: A short, natural-sounding space. Great for giving the feeling that the whole kit is playing in one room.
-
Plate: A bright, dense reverb that is a classic choice for snares. It doesn't have natural reflections, so it doesn't sound like a real room, but it adds a beautiful "sheen."
-
Hall: A long, large space. Use with caution, as it can easily clutter the mix.
-
-
Pre-Delay: This is a key parameter! Pre-delay is the time delay between the original dry sound and the start of the reverb. By setting a pre-delay (e.g., 20-60 ms), you separate the drum's transient from the reverb tail. This preserves the punch and clarity of the original sound while the reverb adds depth.
-
Gated Reverb: The classic '80s sound (Phil Collins). It's a reverb with a very short decay that is suddenly "cut off" by a gate. It can give a snare enormous size and explosion.
-
Delay: A short slap-back delay can add an interesting rhythmic element and width to a snare or the entire kit.
Chapter 4: Workflow – A Step-by-Step Guide to the Perfect Mix
Having all the tools is one thing, but knowing the order in which to use them is another. Here is a proven workflow:
-
Preparation (Repetition is the mother of wisdom): Gain staging, naming, color-coding, creating the Drum Bus.
-
Basic Balance: Without any plugins, set only the volumes (faders) and panning (stereo position) to make the drums sound as good as possible. Start with the overheads and gradually add the close mics.
-
Start in MONO: Switch your entire mix to mono. This will reveal phase issues and help you focus on tonal balance without being distracted by stereo width.
-
Work on Individual Tracks (Subtractive Phase):
-
Go through each track.
-
Gating/Editing: Clean up bleed where necessary (especially toms).
-
Subtractive EQ: Find and remove problematic frequencies (mud, boxiness, resonances). Use an HPF.
-
-
Work on Individual Tracks (Additive Phase):
-
Compression: Apply compression to control dynamics and shape the sound (punch, sustain).
-
Additive EQ: Now that the sound is clean and controlled, add character by boosting desired frequencies (body, attack, air).
-
-
Processing on the Drum Bus:
-
Now that the individual parts sound good, it's time to "glue" them together.
-
Bus EQ: Subtle adjustments for the overall tonal balance of the kit.
-
Bus Compression ("Glue"): Light compression (slow attack, low 2:1 ratio, 1-2 dB of reduction) for cohesion.
-
Bus Saturation: Gentle tape saturation to add warmth and character.
-
-
Adding Space and Effects:
-
Create send buses for Reverb and/or Delay.
-
Send signals (mainly from the snare, toms, and lightly from the whole kit) to the effects.
-
Don't forget the pre-delay!
-
-
Automation:
-
A mix isn't static. Automate volume, sends, or plugin parameters to create dynamics. Boost the tom fills, add more reverb to the snare in the chorus, change the hi-hat character in the verse.
-
-
Final Check: Listen to the drums in the context of the entire mix. You might need to take a few steps back and adjust some settings. Listen to the mix on different systems (monitors, headphones, laptop).
Chapter 5: Genre-Specific Tips
Every musical style has its own specifics. Here are a few quick tips:
-
Rock/Metal: The goal is punch and clarity. Emphasis on the attack of the kick and snare. Sample layering (blending live drums with samples) is often used for consistency and power. Parallel compression is your friend.
-
Pop/Electronic: The drums are often the star of the show. They must be big, punchy, and modern. Don't be afraid of aggressive processing, saturation, and sample layering. The sub-bass from an 808 kick is key.
-
Jazz/Funk: Dynamics are everything. Use compression very sparingly, if at all. The goal is to preserve the natural sound and the interaction between the players. Emphasis on overheads and room mics that capture the performance as a whole.
-
Hip-Hop/Trap: The kick and snare are the foundation. They must be dominant. Heavy saturation, aggressive compression, and working with 808s/sub-bass are daily bread. A minimalist approach to cymbals.
Frequently Asked Questions (FAQ)
Q1: How loud should the drums be in the mix? A: There is no single correct rule. A good starting point is to loop the loudest part of the song (usually the chorus) and set the drums and bass to form a solid foundation. Then, blend in the other instruments. The drums should be loud enough to drive the song but not so loud that they bury the vocals and melodic instruments.
Q2: Should I mix drums in mono or stereo? A: Both! Start in mono to sort out basic balance and phase issues. The kick and snare are almost always in the center (in mono). Then switch to stereo and work on the width by panning the toms, overheads, and cymbals.
Q3: How do I fix a "boxy" sounding kick or snare? A: "Boxiness" usually resides in the low-mids. Search for the problem frequency in the 300-800 Hz range. Use an equalizer with a narrow Q, find the worst-sounding spot, and make a cut of 3-6 dB there.
Q4: My cymbals sound too harsh and unpleasant. What can I do? A: Look for harshness in the 2-5 kHz range. A gentle cut here can work wonders. Another option is to use a de-esser, which will dynamically reduce only the harshest sibilant frequencies, or a multiband compressor. Also, make sure you aren't using too much additive EQ in the high frequencies.
Q5: Should I use reverb on my kick drum? A: Generally, it's not recommended, as reverb can smear the low frequencies and reduce punch. If you still want to try, use a very short room reverb and apply an HPF to it to remove the low-frequency part of the reverb. It's often better to only send the signal from the beater mic to the reverb.
Q6: How do I make my drums wider? A: Panning is key. Pan the toms slightly from the drummer's or audience's perspective. Pan the overheads 100% left and right. Use a stereo room reverb. A short stereo delay on the hi-hat or snare can also add width.
Q7: What are the best free plugins for mixing drums? A: There are plenty of great free tools. For EQ, try TDR Nova. For compression, TDR Kotelnikov (great on a bus) or Klanghelm DC1A3. For saturation, try Softube Saturation Knob. For gates, the one included in your DAW is often sufficient.
Conclusion
Mixing drums is both an art and a science. This cheat sheet gives you the map and the tools, but the real goal is to learn to listen. Experiment. Break the rules. If it sounds good, it IS good.
Don't get overwhelmed by the technical details. Start with the basics, gradually add more techniques, and constantly train your ears. With each new mix, you'll get faster, more confident, and your drums will sound punchier, cleaner, and more professional.
Now go and create the best foundation for your music!
Related Articles
Frequently Asked Questions
What is the best compressor for drums?
There is no single "best" compressor for drums, as different compressor types excel at different tasks. An 1176-style FET compressor is excellent for aggressive snare and room mic compression with fast attack times. An SSL-style bus compressor is the go-to choice for drum bus glue. An LA-2A optical compressor works beautifully for gentle overhead taming. For modern metal and rock drums, a combination of a fast FET compressor on individual hits and a bus compressor on the drum group delivers powerful, punchy results.
Should you compress every drum track?
Not necessarily. While compression is a fundamental tool in drum mixing, applying it indiscriminately to every track can squash the dynamics and life out of your drums. Kick and snare almost always benefit from some compression, but overheads and room mics may sound better with lighter treatment or none at all. Listen critically and compress only where it solves a problem -- such as taming inconsistent hits, adding sustain, or controlling transients. Sometimes EQ or transient shaping is a better solution.
What ratio should I use for drum compression?
Compression ratios for drums vary depending on the desired effect. For subtle dynamic control on overheads, a gentle 2:1 to 3:1 ratio works well. For snare punch, 4:1 to 6:1 is a common starting point. For aggressive parallel compression or heavily compressed room mics (the "trash room" technique popular in metal), ratios of 10:1 to 20:1 or even limiting can create exciting, explosive sounds. Always adjust the ratio in context with the attack and release settings for the best results.
How do you compress a kick drum?
To compress a kick drum effectively, start with a medium attack time (10-30ms) to let the initial transient click through, and a medium-fast release (50-150ms) timed so the compressor recovers before the next hit. Use a ratio of 3:1 to 6:1 and adjust the threshold until you see 3-6dB of gain reduction on the peaks. For metal kick drums with fast double-bass patterns, a faster attack and release may be needed. The goal is to even out the dynamics while preserving the punch and low-end impact that drives the song.
Related Products
Check out our professional presets and templates:









1 comment
Jason Barclay
I just spent about 2 hours going meticulously through your ultimate drum cheat sheet with my kit, and it sounds awesome! Seriously this is the best my drum recordings have sounded yet. Around a year ago I decided to set up a drum studio in an extra bedroom. Walls are covered with thick moving blankets. Very small, dead room. Using overheads mainly to capture cymbals. I used Slate and T racks plug ins. NOTHING SPECIAL. These tracks sound great! Thank you!
Leave a comment
All comments are moderated before being published.
This site is protected by hCaptcha and the hCaptcha Privacy Policy and Terms of Service apply.